As An Amazon Associate I Earn From Qualifying Purchases At No Extra Cost To You Learn more.
We are used to seeing suet cakes in the winter advertised to help the birds in cold weather. Cold and wet weather means that non-migrating birds need more calories in their diets. The fat in a suet cake fills that need perfectly well. Although I love to see a red cardinal in the winter, my favorite non-migrating birds are my lovely hens scratching around in the yard.
Even if you give your hens the most beautiful and elaborate shelter, they will choose to get out in all sorts of weather. Chickens are incredibly cold hardy despite their small size and will commonly walk out into the snow to satisfy their curiosity and love of the fresh air. As long as their shelter is available to them as a free choice they will decide when they need to warm up and when they want to play in the yard.
There are lots of cute ideas on the web about how to make Suet Cakes that use bird seed, raisins, nuts and such, but I get really excited about ways to feed my chickens using kitchen scraps. [Yes, I know I need help.] For me, a Suet Cake for my chickens takes it up a notch because I am able to use the extra cooking grease that is so hard to dispose of anyway.
My husband covets bacon grease (I’m not really a fan), but beef and chicken drippings are really just a hazard to dispose of. Anyone teaching a kid to cook has probably had the fun of trying to calmly explain to the child why you told them 30 minutes ago not to pour cooking fat down the drain as you try desperately to heat up the sink and pipes before the fat creates an impenetrable clog.
Making your own Suet Cake is not only a win for your sink, a win for making use of kitchen waste, and a win for your hen’s winter diet: but I also found a grain and seed substitute that makes use of that ‘dust’ that your hens won’t eat in the feeder…quadruple win!
If your hens are like mine, they will gobble up the pellets and refuse to eat all the little crumbs in the tray. If you hang your feeder high enough they won’t be able to scratch it out on the ground, but they will still use their beaks to display their disdain for it. I need to find an easier way to do this, but this time I sifted that out and collected it. I just keep a jar under the sink with this ‘pellet dust’ and I can mix up a ton of suet cakes at once when their are left-over drippings. I’m guessing it is full of minerals the girls should be eating anyway.
Keep adding dust past the ‘brownie mix’ stage and go all the way to ‘wet sand’ stage. Press it down into your container, put the lid on and pop it into your fridge or freezer. It will harden up fairly quickly. Make them into whatever shape you can easily pop out. They don’t make my little round Ziplock containers anymore, but these Glad rectangular ones are also 8oz just like the containers I use for the whole process.
I bought this large suet cake holder that I not only use for winter snacks, but also for holding produce up off the ground to entertain the hens. It’s my favorite way to get rid of a zucchini I forgot about in the fridge. As I have been making these, I try to make them bigger and bigger because it’s a more efficient use of my time and space….and at some point I may buy a flock block if I find I fall behind in having enough snacks.
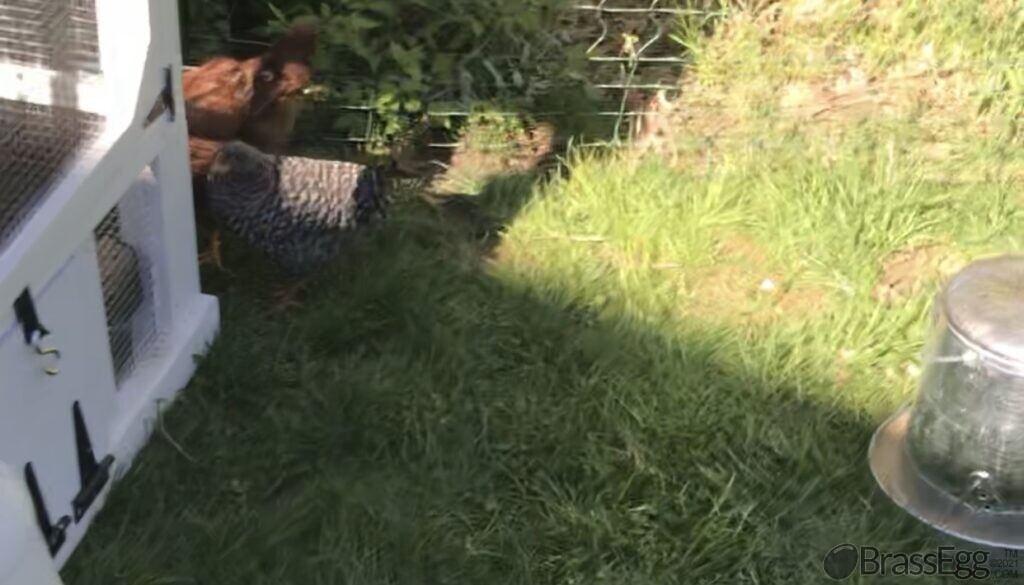
Here you can see the chickens pulling out cucumbers and then carrying them off to their own corners. They love things like cucumbers and squash! There are lots of great suet cake holders out there, but the one I have here is heavy-duty. If you want one like mine, look for an easy to fill one because the hens act like little toddlers waiting for candy. I’ve had a hen more than once jump up waist high and try to nab a treat. It’s all one compartment so you can pop really big things in. We’ve put about 10 corncobs in there after supper and watched the chickens for an hour. It’s just nicer to have it up off the ground so it doesn’t become an eyesore. They also aren’t eating dirt and other ‘stuff’ accidentally. (I’m sure they eat enough of that on purpose!) Because it swings from a chain all over the place it seems to entertain them more too, and that’s even more fun to watch.
As An Amazon Associate I Earn From Qualifying Purchases At No Extra Cost To You Learn more.
Welcome to my backyard chicken coop. It is a daily joy for me to be able to see this pretty little doll-house of a chicken coop in the backyard. Even when the chickens are away at their ‘summer home’ the coop is a delight.
I’ve waited so long to get chickens, I want to squeeze every bit of joy out of this experience that I can. A handsome coop has made my kids and husband enjoy it more. Each of the kids (even as teenagers) have taken their friends to visit the chicken coop. My husband stares out at them several times a day while sipping his coffee. I’ve seen impressive shed-sized chicken coops and heart-stopping stone chicken coops, but when it was time to actually put down the money and accept that when I sell this house not everyone wants to try to keep a flock of hens inside a subdivision, I knew I had to be realistic. I couldn’t believe my luck when I ran across this coop on-line. It is a miniaturized version of one I saw years ago and fell in love with.
I ordered it immediately because COVID had created so many shipping delays I didn’t want to take any chances. When it arrived I realized the cute paint job wouldn’t hold up to the weather very well. So I painted all the pieces while they were still flat. It was a good opportunity to use up the extra paints I had…half a quart of white glossy exterior here, full can of a different brand flat white there, plus 3 cans of 8 year old spray paint at the very end.
When I assembled it I was so in love! But then I realized that it felt a lot smaller than I imagined and created some problems. At that time I was in sold on the Joel Salatin chicken tractor idea, and convinced I was going to pull this coop to a different spot every day so the chickens could have fresh grass! Yep, I live in a dream world! Even in my state of denial I could tell this coop could not sustain dragging across a lawn.
In addition, there was a “feed storage space” built in which created a wooden floor right on the ground. If you’ve ever lifted even a random board that’s been on the ground over a year you know that mice and snakes consider that prime real estate. If you store any food there you just put in a buffet!
Then there was the ramp that was supposed to go up to a floor area. Double why? Chicken ramps get covered with poo and look nasty and baby chicks can’t use them. And why put a floor in anywhere? Do you enjoy cleaning out chicken poo? One of the best innovations of chicken keeping has been returning to the old-fashioned deep litter method that lets you clean out the chicken coop only once a year. Some do it even less than that.
Lastly, there just wasn’t enough space. We moved the babies into it for a week before taking the coop outside, and it was clear we would need a chicken run/yard. The description was honest, it would only hold 2-3 chickens, but 9 of my baby chicks had survived. I also didn’t have bantams, I had bought Road Island Reds and Barred Plymouth Rocks, some of the bigger chickens on the market. My solution wasn’t simple, but it addressed all four problems.
Adding another “story” of living space would mean I could put skids on the ground contact points to make it easier to drag from location to location (please!) Large eye-bolts were attached to the heavier lumber used as skids to make attaching a rope easier. The “feed storage space” would become more scratching area, making the space under the nesting boxes usable. Baby chicks or injured hens could walk from front to back without needing a ramp. An extra “floor” would create more space by making more roosting areas. On top of that, the deep litter method is easier if you don’t have support boards running along the ground that either rot in the nutrient-dense litter or that provide a safe home for a mouse or snake.
Because I have never done this before, I hoisted the entire finished coop in the air to try to gauge how much height I should add. There are certainly easier ways to do this, but I wanted tosee if it would be too top heavy, be too tall, and if it would provide enough space inside. Turned out that 12′ was the right height to add, which would have been a decent guess and have saved me 4 days of balancing the coop on buckets and blocks.
I used the stack of extra 2″x3″ studs I had in the garage and was able to cover the exterior walls with the useless floor that came with the coop. More 1″x1″ hardware cloth added to the bottom of the ‘attrium’ also made it possible for me to create a little pop door for the chickens that can be left open all the time instead of opening the large door needed for feeding.
I honestly thought this would solve my problems with the design of the bought coop, but my learning curve has been steep even from there. The chicken tractor idea was the first to go. I moved this monster three times and realized that was not sustainable. The idea of a chicken tractor makes a ton of sense, but not for a suburban lawn. It’s not just the weight of my pretty coop and the fact that most chicken tractors are more of a summer time shelter thing. There is also the fact that the idea helps equally distribute fertilizer across the green space. In open fields where you aren’t surprised to step in an animal poo, ok. In your backyard if you don’t want your children’s friends to wear their nice shoes in the backyard that becomes an issue. We quickly found the ideal backyard location for ‘chicken watching’ and planted the coop there. I’ve adopted the deep litter method, which is my preferred option, and still working through a concept I have for composting directly in the chicken run.
The nesting box was another problem area because the original design had used a poo-catching floor which allowed hens to walk right into the nesting boxes without flying up or even a little hop up. Adding roosting bars over deep litter made weekly cleaning a moot point. However, chickens want to lay their eggs at the same level or below where they roost. So, I removed the floor of the nesting box and now the hens lay their eggs one level down where the ‘feed storage area’ used to be. This is still not good enough for some hens and they insist on laying on the ground level…but we are making progress on that.
The little pop door was so cute and clever, but this is the only blurry photo I got of it while it was new and clean. It was designed with hinges on the bottom due to advice that you never want your coop door to be able to shut the hens out accidentally. The pop door helps a little bit in protecting from predators because the door is too small for large predators to fit through, but it also gives the chickens constant freedom instead of waiting on a human to let them out in the morning or closing them up at night.
However, the door created a bit of a ramp that the chickens constantly slipped on, and quickly became covered in mud and poo which is an eyesore. In addition, an industrious mouse had found this shelter and was building it out as a condo near the feed source. Taking the cute door off was necessary.
The most important issue is something I will be tweaking all winter…. ventilation. Adequate ventilation is essential to chickens. It is more important than heating the coop beyond providing wind breaks. That is why the summer coop is so open and airy. This coop did not have adequate ventilation when I first constructed it, and I am still trying to figure out if I should add more going into winter. At the same time, I’m worried about the cold winter winds and I’ve installed a large sheet of plexiglass on the house side of the coop to protect the atrium from rain and snow and harsh winds. The feed no longer gets soaked and I see the hens enjoying the view during downpours. I have flimsy plastic to add inside the other screens of the atrium, but I don’t want to ruin all the ventilation. I’ve read they need the ventilation to be above their roosts, but I don’t know what that means for my ground-level doors.
In the end, it would have been cheaper and easier to have constructed the coop myself. I knew that going in. It would have never looked this good though. I am pretty handy and have built a few things in my time, but I know my limits. Constructing all the little doors and getting the proportions just right would have pushed me too far. I also love the this cute mobile coop. This coop is a delight to look at every day. It elevates my joy as I watch the hens throughout the day. I found the perfect design for my taste. If you are more of a Frank Lloyd Wright fan, then you may find it much easier to build your own. I encourage you to find something that appeals to you so strongly you are willing to do a little more to make it work. Beauty is it’s own reward.
As An Amazon Associate I Earn From Qualifying Purchases At No Extra Cost To You Learn more.
Friday my son said, “Can we please get rid of this rag? I think it’s done.” It was a rhetorical question. He just asked for a laugh because the kids love to poke fun at my really weird sense of economy. I cut up old Henley shirts as “floor rags” but I spent a very “not thrifty” amount setting up our chickens. It looks crazy to the family to spend so much money and time on chickens when you can get a dozen eggs at Dollar General for about a dollar or organically feed ‘free range’ (free range my foot) eggs for about $6. My husband and kids see these things through an economic lens and sense of time scarcity.
I see these decisions through a wastefulness and supply chain lens. A 2003 Fast Company article claimed that the US spends more on buying trash bags than many countries spend in a year. Even though that claim is under scrutiny, I still resist buying trash bags (my husband will sneak them into the house because he despises how reusing grocery bags often leads to leaks on the floor). I returned the diaper genie from my first child’s baby shower and stuffed empty tissue boxes with Wal-Mart bags. I felt somehow more virtuous for tying up each full disposable diaper in a plastic shopping bag. Ah, baby-steps. It wasn’t until my last child was having difficulty potty training that I considered escaping disposable diapers. An English friend loaned me her supply of cloth diapers and walked me through the process of how to deal with them. That was when I began considering going past the ‘recycle’ trap, past the ‘reuse’ virtue and into the ‘reduce’ freedom. [By the way, no judgment here if you are using disposable diapers…surviving those years is hard.] Using cloth diapers for my last child in his last months of potty training was too late to make a huge difference in the diaper years, but I can tell you this: It certainly sped-up potty training!
As a side-note, if you are struggling to get your little one to get serious about the potty, having a wet, heavy cloth diaper makes a world of difference. I also can’t recommend enough the top potty chair used in England. It is so hard for a child to kick over, there are no little crevices for stuff to get stuck in and it lacks any interesting elements that would make it fun to play with. In England you can get one for a British Pound, roughly how we think of a dollar. They are harder to find in America, but there is this one.
Full disclosure: I gave birth to my last child in England and suddenly found myself with three children age 3 and under. All this recycling, with real glass glasses for kids, standing in front of the trash area separating out all the elements, while one child is frantic to nurse and another child trying desperately to hold it so you can walk him into the ladies room….oh, that was hard. I thought I would loose my mind trying to survive among all this enlightenment! However, now I can see I was dealing with too many learning curves at once.
Living in England for a few years gave me the opportunity to watch how historic castles and large manors are managed by families who take their legacy seriously. Though you will see recycle bins there, you won’t see them over-flowing. If you dine on the grounds you will be served on stoneware and you will drink from an actual glass. By not creating the trash in the first place, they head the problem off at the pass. You will also see bins that break recycling apart from composting. Many properties will quickly put organics (paper or food scraps for example) into their own compost system so it can be broken down to serve their immense gardens. In other words, instead of paying people to haul all the garbage away and then paying someone else to haul in fresh soils and fertilizers they have their customers separate everything for them and use what they can on-site. I also saw this type of sorting system in a Denver, Colorado chain restaurant in 2016, so it is spreading to the U.S.
So, how does England tie into these pitiful floor rags? I can’t place my hand at the moment on which book it was, but one of the gardening books I read decades ago showed a British man standing atop his 6′ tall compost bin at his Manor home. The caption noted that this Aristocrat made sure to compost everything on his property, even cutting the buttons off his old shirts before throwing them into the pile. I thought, ‘Surely you could find something to do with the Lord of the Manor’s dress shirt before it ends up compost?’ His point was taken though…everything is a resource. You paid for it. Get every bit of good out of it you can.
So, what makes it easier to close the loop? How do the British make it look posh instead of poverty-ridden? After reading several books such as this and this and lots of experimenting I have come to the conclusion that:
#1 – Buy quality clothing that actually fits even after it’s been washed. It’s taken me hitting mid-40 to plunk down the extra money to get ‘Tall’ sizes from a brand I trust instead of only hitting the clearance rack. Not buying cheaply constructed clothing (known as ‘Fast Fashion’) saves time and money in the long run considering how many more times you can/will wear it and that you don’t have to waste time shopping/searching for clothes that fit.
#2 – Try to use each resource for it’s highest and most valuable purpose. It makes more sense to donate clothing that someone would actually want. You can only use so many floor-rags.
There is actually a market for natural fiber cloth scraps that the charity shops sell/donate to. It’s called Textile Recycling. Do the volunteers a favor and bundle that all together and label the bag to save them time.
#3 – Only cotton or blends with very little poly in them actually work as cleaning rags. Every type of old shirt and sweat pants have been experimented with. Even if you have the patience to deal with a non-absorbent rag it’s not worth frustrating your kids and spouse if you want them to do their chores without complaining (I should say…’even more complaining’).
#4 – I will feel smugly virtuous if I can take a shirt from years of wearing through floor rag and into compost bin. It’s a vanity, but these days I will take whatever prideful indulgence I can find.
#5 – It’s not my job to save the world. Thinking that way stresses me out and puts me at the mercy of needing to please other people. I won’t be bullied into someone else’s concept of ‘green’ when my core value is to ‘not be wasteful’. I just want to be like those heirs of the manor who take care of their own backyard. And you have every right to pursue what resonates with your core value; it is likely different than mine.
This last one means I just need a plan for my stuff. The sheer volume of our ‘stuff’ overwhelms me pretty fast, so to give myself some breathing room I have a place to keep things for every stage. Britain has influenced me here by making all those stages behind closed doors or somehow hidden so my thrift doesn’t become an embarrassment. I used to take off all the bands, seams and square up the rags so the kids couldn’t tell it came from a shirt. After 3 washes the rag has no shape anyway. The teens just want the tags removed and no ‘tighty whities’ because that would be too embarrassing. We also struggle with socks because they work great, but it never stops looking like a sock…..too embarrassing for kids!
I’ve got several hiding places and even got the saw out and made a real mess of our old first generation ‘Pull Out’ trash can system that didn’t have a recycle compartment. I’ve just left my recycling under the sink and now I have a composting compartment! I even put hubby’s collected coffee grounds in there so I can put them directly into the garden soil instead of cycling them through the compost bin. This has required a bit of work to set up, but day-to-day it is oddly satisfying to swipe juice off the floor with a soft floor rag from my college pull-over or put a tissue into the composting can. Probably something a little wrong with me.