Storing Seeds In Your Deep Freezer For Years

I tend to over-buy things that I like. I didn’t use to be like this, but after living in England for three years and discovering that Oreos are only sold in the store 3 weeks in the year I became a ‘stocking up’ kind of girl. When we came back to America and had the chance to garden I became fascinated with seeds and acquired far more than my tiny heavily shaded back yard could handle.

Add to this the desire to save my own seeds and I had to find a way to improve my seed storage technique. Mimicking nature becomes the secret here. Keeping the seeds cold can keep them in a hibernation state. In fact, when planting Rye Grass it was suggested to freeze the seeds before sowing them to improve the germination rate. Supposedly this would mimic nature’s winter/spring cycle and hopefully trigger a more vigorous response from the seed.

Freezing doesn’t work with many tubers or root stock (a few do great, but many don’t). Even professional seed collectors find that most tubers only last 18 months. I have not had good luck with saving bulbs and I have had asparagus struggles in the past, so I don’t know if my Mary Washington Asparagus will sprout next year, or if my daughter will be able to get the Ranunculus to bloom. If you want potatoes and you don’t want to study the different kinds, just grab the ones that sprout in your pantry this spring and plant them in your garden. Have yourself a fun surprise!

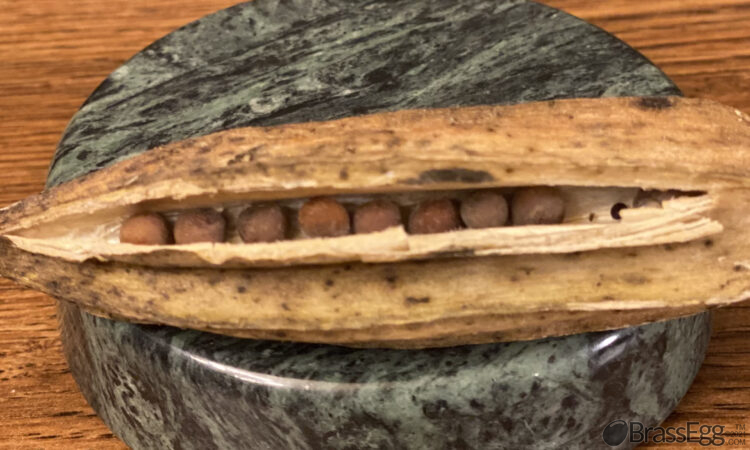
Stirring my Amaranth seed each day creates a puff of dust. There might be trapped moisture in the seeds that I can not fully release with just air drying in a climate-controlled house. For seed saving in particular I rely on freezing to get that little extra protection from moisture, tiny seed eating bugs and potential mold spores that turn into rot.

For the Amaranth, I stirred it one more time really well, then separated it into smaller paper bags. Labeled them with year, name of strain and seed company that parent seed came from and secured the tops. Here are all my saved seeds together. The Okra, Marigold, Lettuce and Cilantro regardless of year will be bundled with the Amaranth so I can find them quickly.

In the coming spring, saved seed and clearance hybrid seeds will be the first things planted as I try to convert the clay construction site into a thriving garden area. Having armor on the soil and a living root in the soil is tantamount to kick-starting good soil…so I will risk these cheaper seeds in hopes that a late frost won’t kill them. I also won’t kill weeds in the traditional sense because weeds can serve a purpose when the soil is this bad. Instead weeds will be bent over if they begin to overly shade the seedlings.

When there is truly no danger of frost the more expensive and curated seeds will be planted. Seed varieties that I know my family loves to eat like the buttery lettuce that Martha Stewart no longer sells. There is the Rosemary that we hold onto in case we can’t find a seedling or plant to buy. There are the seeds that come with a great story like the Mortgage Lifter Tomato that is said to have single-handedly paid off a farmer’s mortgage. And then there are the novelty seeds that our children beg for that will thrill the whole family.

A word about cheap seeds, clearance seeds and seeds when someone is empting out their garage. The cheap seeds at Dollar General are often hybrids, and there is nothing wrong with that, but you should be aware that saving seeds from the hybrid will result in a very different plant than the parent. Taking all seeds that are given you or even buying ones at steep discount (I got this stash at 90% off at the end of summer) gives you a huge variety to test out. Storage is the key here. If the seeds were for sale inside an air-conditioned space the clearance seeds should be fine (root stock and bulbs might not do so well). If someone gives you a box of seeds from their detached, moist garage just be careful. I would store all those seeds together away from my other seeds, wrap them in plastic and put them in the freezer. There may be all sorts of living things in those seeds from moths to weevils to mold spores. There may also be a seed in there from a nearly extinct strain of corn. If you like variety in your life, this is a huge opportunity. Store it effectively and buy yourself time to discover what works for you.

Brass Egg™ participates in affiliate marketing programs, and may receive compensation when you click and purchase from links to retailers. Brass Egg™ of Russell Holdings Group, LLC 2021. All content ©2021 Russell Illinois Holdings, LLC. All Rights Reserved.

How To Collect Okra Seeds For Planting Next Year

Like many vegetables, the germination rate (percentage of seeds that actually sprout) and the vigor (how strong each seedling grows to be) of an okra seed is improved if it is allowed to fully mature on the ‘vine’. Okra is best left on the stalk/vine until the seed pods dry out so much that they begin to split on their own and spill out.

Most importantly, you must purchase Heirloom seeds from the beginning if you want to be able to collect viable seeds for the next year. Heirloom seeds will say so on the packet, and sometimes are more expensive, but certainly worth it. This year we planted some Hill Country Red Okra which is an Heirloom out of South Texas. If the packet doesn’t say “Heirloom” on it somewhere then you should assume it is a much cheaper hybrid which will grow fine for you the first year, but it’s seeds will not reproduce like the original. It’s fine to grow hybrids, but there really is a thrill to saving your seeds and planting them the next year. A gardener’s version of being a grandparent!

The kids randomly planted seeds around the construction site having no idea what might actually grow. One of the Okra got a foot-hold in the clay and even though it was planted in heavy shade too late in the summer, it was able to bring one seed pod on. I didn’t discover it until I got really good at using my hands free crutch. One seed pod isn’t enough to bother cooking, plus it was far too mature to eat. This is actually a blessing after all, we now have an Okra that survived zone 5!

One month later in early November it had dried out and all the leaves had fallen off. Perhaps I should have let this seed pod remain on the plant for a few more weeks to allow it begin to crack open on it’s own. The plant was in the area I was planning to move the coop too though, so I had to pick it. 44 seeds came out of this one pod. Only 1 was clearly not viable, you can tell from the shriveled shape of the small seed on the closest edge of the paperweight. The rest appear to be fine until….

Opening the original seed packet reveals that the commercial seeds all have a dark slate coloring. In comparison my 2020 Zone 5 Okra seeds look brown and immature. This could be a cosmetic preference of the seed seller, a slight variation my plant created to survive the cooler weather, or maybe they are not fully mature. I won’t know until next year when they start coming up out of the ground. Can’t wait to compare my 2020 Zone 5 to the original South Texas Heirloom!

Okra is a Southern Side dish I don’t see often now that I’ve moved North. If you get a helping of it up here, it was likely raised in India and shipped over. If you want to do a deep dive on the subject, there is an entire book on Okra! There are lots of reasons to grow it as a new gardener, the biggest being that deer and other wildlife won’t mess with it. The stalks and leaves are so prickly that my mom would wear long sleeves and gloves….but she was harvesting a full row at a time. For the absolute best taste, harvest only the best immature okra to make up for supper that
night. If you see mature seed pods let them go and harvest them for seed later. The flavor goes downhill rapidly after the first day they’ve been picked, so only harvest a bunch at one time if you plan to prep and freeze them by bedtime.

A second good reason to start out with Okra is because it doesn’t require irrigation and likes well-drained soil. I like it as a “border crop” to create an unpleasant barrier for foraging animals. You can also use it to expand your garden planting area by using a part of the garden that the sprinkler won’t reach or in an area that you are just beginning to improve the soil.

Brass Egg™ participates in affiliate marketing programs, and may receive compensation when you click and purchase from links to retailers. Brass Egg™ of Russell Holdings Group, LLC 2021. All content ©2021 Russell Illinois Holdings, LLC. All Rights Reserved.

Chicken Waterers: Lots of New Choices!

I own several chicken watering methods, but one has completely stolen my affection. I plan to test these other types, but for my situation I’m convinced: these vertical watering nipples are the best. As the temps dip into negative territory I will have to use the old-fashioned watering fonts with a heated base, or a new design with side nipples and a heated base, but this summer we found these watering nipples kept the water always pure without any chance of the chickens getting into it.

This is a very affordable approach to watering because you are only buying the nipple and you are providing a jug that you pull out of your recycling bin. I know some people use buckets, but I prefer the jug. One reason is that you can see from a distance if the hens are out of or low on water. You also can prevent chicken poo from getting inside along with leaves, dirt or even most bugs. This vertical nipple also has the most simple parts that can be taken apart and cleaned if there is an obstruction. There is no spring or fragile part inside to break, though there are small parts that if you drop in the field you probably won’t ever find. The waterer is high enough off the ground that mice can’t use it as a water source and it even denies song birds. It may seem mean to not water the song birds, but they are known to carry diseases that aren’t good for your hens, so dissuade them from hanging out in your chicken coop.

For winter time I was pleasantly surprised to find that the vertical nipples continued to work even after the top of the waterer froze and bubbled out the top. Overnight the top 1/3 of the jug froze solid, but the bottom water was still flowing easily. I tested this watering jug one more day like this. The next day the entire waterer was frozen solid, but the hens were still able to get drinks of water as little amounts of ice melted through the day in the sun. Luckily I had made a second waterer over the summer and I just traded out the frozen solid one with a fresh jug each day.

Vinegar comes in thick plastic jugs that hold up to a lot of use and we have several. I mostly use the Heinz white vinegar jugs that hold 1.3 gallons, but removing the label is an hour-long event if you don’t loose your patience first. If you have an IGA near you, their vinegar jug labels wash off easily, the lid is white, stays attached and they are a standard 1 gallon. Make sure to poke a hole in the top of the lid because the nipples won’t work with a vacuum. I use pliers and a hot nail. You can leave the lid off, but you may find dead bugs floating in it.

If you want to get really fancy you can hook it up to plumbing by creating a PVC pipe of waterers. I’m not that fancy, instead I use a large ‘S’ hook so I can attach the jug to any chain at any height I want. You can get a standard rust resistant hardware ‘S’ hook like mine here, or you can get a snazzier one like they use for pot racks here.

You’ll simply drill two or three 3/8″ holes in the bottom of the jug and screw in the nipples being careful not to over-tighten. The rubber gasket shouldn’t squeeze out the edges. From experience I suggest you test on a jug you haven’t spent an hour getting the label off of (just a word to the wise). You’ll find you have less dripping if you are screwing into a relatively flat area of the jug bottom. While you are at it make 2 so you can go away for a 2-day trip without worrying about your hens.

Even baby chicks quickly figure out how to use these nipples. They are drawn to the noise and peck it out of curiosity at first. We even were able to boost their immune systems when they were young by adding a little Apple Cider Vinegar to one little waterer made from a soda bottle. Some of the chicks sat there and hit the vinegar over and over again, shaking their head after each drink. They must have needed it!

There are two other types I am holding onto and planning to test out over the summer. These Poultry Watering Cups may prove to be a better option in the hot days of summer so they can drink deeply. I would like to test out some ideas of using rainwater catchment off the coop roof and making that available to my chickens so there is a back-up source of water. In that situation the waterer must feed from the side because there is always settlement in rain water and that would clog up vertical waterers attached to the underside of a container.

Another way I may use these horizontal waterers is when I get new baby chicks and have them with a mama hen. I may install vertical nipples on the bottom of the jug and hang it low enough for babies, while putting a horizontal cup at the side so mama hen can use the same one.

I’m also planning to test these designs I find interesting. The only problem I see with this horizontal design is that it relies on a spring inside. The vertical nipple uses gravity and a steel ball. Vertical has no spring and despite a rubber gasket, looks like it might last a decade. You also can’t take apart this horizontal version, so cleaning it out may not be an option. However, instead of a large cup that could catch lots of chicken ‘stuff’ this small little perch under the nipple might work better.

Brass Egg™ participates in affiliate marketing programs, and may receive compensation when you click and purchase from links to retailers. Brass Egg™ of Russell Holdings Group, LLC 2021. All content ©2021 Russell Illinois Holdings, LLC. All Rights Reserved.